 how-to
What Makes a Still Durable: Copper Quality Guide 2026
Table of Contents
- Why 'Still' Means Distillation Equipment, Not Just Any Still
- How to Verify Copper Purity Before You Buy
- Copper Still Solder: Why Lead-Free Silver Bearing Matters
- Construction Details That Separate Durable Stills from Weak Ones
- Copper Still Leak Test: What to Check Before First Use
- Copper Still Maintenance: Cleaning, Storage, and Inspection
- Conclusion
- Frequently Asked Questions
Last Updated: October 5, 2026
Why 'Still' Means Distillation Equipment, Not Just Any Still
Ask ten people what makes a still durable and you will get ten different answers.
Most buyers focus on the boiler size or the condenser shape. The real question is simpler.
Below, we break down what actually drives still durability, from copper purity to solder choice to the small construction details that separate a lifetime tool from a disposable one.
How to Verify Copper Purity Before You Buy
Copper purity is the single biggest factor in how long a still lasts, and it is also the hardest thing to check from a product photo. Here is how to verify it before you spend money.
Start with the paperwork. A reputable builder should be able to tell you exactly what alloy they use and where it came from.
Checking Material Certifications and Mill Test Reports
A mill test report is a document from the copper supplier that states the alloy, the temper, and the chemical composition of the metal. Ask for it.
Here is what to look for on the report:
- Alloy grade: C11000 is standard electrolytic tough pitch copper, the common choice for stills
- Purity percentage: The best stills use 99.9% pure copper, which resists pitting and stress cracking
- Temper: Soft or half-hard tempers bend without cracking during forming
- Thickness: 20oz copper is a common benchmark for structural still bodies
A quick field check works too. Pure copper is soft enough to scratch with a knife and has a warm, reddish tone. If the metal feels stiff or looks yellow, it may be an alloy.
Copper Still Solder: Why Lead-Free Silver Bearing Matters
Solder is where most cheap stills fail, both structurally and from a safety standpoint. Lead-free silver bearing solder is the standard for any still that touches consumable spirits.
Here is why. Lead solder is cheap and easy to work with, but it can leach into vapor and condensate over time.
Silver bearing solder costs more and takes more skill to apply. It also creates a stronger bond that holds up to repeated heat cycles.
How to check what you are getting:
- Ask the builder to name the exact solder alloy and confirm it is lead-free
- Look for joints that are smooth and even, not lumpy or gray
- Confirm the solder is applied at the seam, not slathered over the outside as a patch
At Steven StillZ LLC, every still is joined with 100% lead-free silver bearing solder. That is not a marketing line.
Construction Details That Separate Durable Stills from Weak Ones
The shape of a still matters as much as the metal. Two stills can use the same copper and still fail at very different rates based on how they are built.
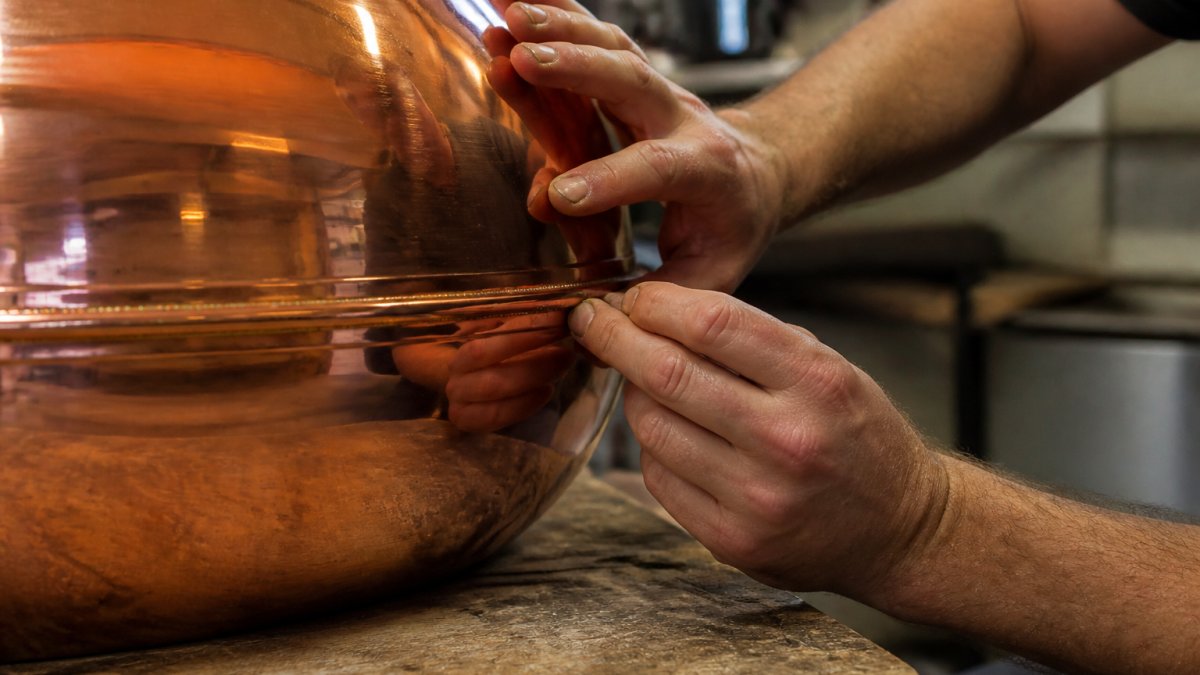
A few construction choices do most of the work:
- Rolled seams: The copper is folded over itself before joining, which spreads stress across a wider area
- Hemmed edges: The lip of the boiler and column is folded back, so there is no raw edge to catch and tear
- Beaded joints: A raised bead at the seam adds rigidity and helps the joint resist flexing under heat
- Even wall thickness: Thin spots create hot spots, and hot spots crack first
Load distribution matters here too. A still that hangs its weight on a single weak seam will fail at that seam. A still that spreads the load across several reinforced joints will outlast it every time.
Copper Still Leak Test: What to Check Before First Use
Never run a still for the first time without a leak test. Even a well-built unit can develop a pinhole during shipping, and a leak in a vapor path is a safety issue, not just a performance one. What most guides leave out is that "leak test" is not one test. It is three, and each one catches a different failure mode.
Test 1: The Water Test (Gravity Leaks)
This catches liquid escaping through a bad seam or a cracked fitting under static load.
- Fill the boiler about halfway with water
- Seal the column and condenser as you would for a normal run
- Let it sit for 30 minutes, not ten
- Check every joint with a dry paper towel, a slow weep shows up as a damp spot long before it shows as a drip
A water test only proves the still holds liquid at rest. It says nothing about vapor.
Test 2: The Pressure Test (Vapor-Path Leaks)
Vapor leaks are the dangerous ones because they are invisible and flammable. This is where measurable criteria matter.
- Cap the condenser outlet and any open port
- Apply low air pressure through a fitting, most builders use 1 to 3 psi, which is enough to reveal a pinhole without stressing the seams
- Brush soapy water on every joint: boiler seam, column base, condenser inlet and outlet, and any threaded connection
- Watch for bubbles for a full two minutes per joint
Do not use a compressor set to shop pressure. Ten psi on a soft-copper boiler can deform a seam that was fine before you tested it.
Test 3: The Vacuum Check (Optional, for Sealed Columns)
If your still uses a sealed column or a gasketed connection, a vacuum check catches leaks that pressure pushes closed. Pull a light vacuum with a hand pump, close the valve, and watch the gauge. A gauge that holds steady for five minutes is a pass. A gauge that creeps back toward zero is telling you a gasket or a joint is not seating.
What to Do When a Test Fails
Stop. Do not run the still. A failed pressure test is not a "run it and see" situation, vapor plus an open flame or hot plate is the exact combination that causes still accidents.
- Photograph the bubbling joint before you touch it
- Contact the builder with the photo and the test conditions (pressure, hold time)
- If the still is under warranty, let the builder repair it rather than attempting your own solder patch
- If you patch it yourself, re-run all three tests before the next run
Every still from Steven StillZ LLC goes through a water test and an air pressure test before it leaves the shop. That is part of why we back each unit with a 100% money-back or replacement guarantee.
Copper Still Maintenance: Cleaning, Storage, and Inspection
Maintenance is where most still owners either extend the life of their equipment by years or shorten it by months. The rules are not complicated, but they are specific, and they only make sense once you understand what actually kills a copper still.
The Three Failure Mechanisms That End a Still's Life
Copper does not wear out the way steel does. It fails in three predictable ways, and each one has a different prevention strategy.
1. Chloride stress corrosion cracking. This is the big one.
2. Dezincification. This only applies to brass fittings and to copper alloys that contain zinc.
3. Galvanic corrosion at dissimilar-metal joints. Every time copper touches stainless steel, brass, or aluminum in the presence of moisture, you have created a small battery.
Cleaning Without Damaging the Patina
The green-brown patina on a working copper still is not dirt. It is a protective oxide layer that helps the copper resist further corrosion. Scrubbing it off exposes fresh metal to the same conditions that created it.
Do not scrub it off with abrasive pads or harsh acids. Instead:
- Rinse with warm water after each run
- Use a soft cloth and a mild dish soap for stubborn residue
- For heavy build-up, a paste of lemon juice and salt works, then rinse well
- Dry immediately, inside and out
Storage and Seasonal Care
Copper hates standing moisture. If you store a still wet, you will find green spots at the seams within weeks.
- Dry the interior completely before storage
- Store in a dry space, away from temperature swings
- Cover the openings to keep dust and insects out
- Inspect seams and solder joints before each season starts
The Pre-Season Inspection Checklist
A ten-minute inspection before every season catches small cracks and loose joints before they become leaks. Work through this list in order:
- Seams: Look for hairline cracks, especially near the boiler base where heat cycles concentrate stress. A crack that catches a fingernail is a fail.
- Solder joints: Look for gray, chalky, or crystalline deposits. That is a sign the joint is being attacked.
- Brass fittings: Look for pink or reddish discoloration. That is dezincification, and the fitting needs replacement.
- Dissimilar-metal joints: Look for white or green crust at the junction of copper and stainless. Clean it, dry it, and consider a dielectric fitting if it recurs.
- Interior: Look for pitting, small dark pits in the copper surface. Pitting is the early stage of a through-wall leak.
Repair or Retire?
Not every problem means a new still. The rule of thumb most builders use:
- Repairable: Loose solder joint, failed gasket, dezincified brass fitting, minor surface pitting
- Borderline: A single hairline crack at a seam that has not propagated, a skilled builder can sometimes re-solder it, but the still should be pressure-tested and monitored
- Retire: Stress corrosion cracking that has spread along a seam, through-wall pitting in the boiler, or any crack in a structural joint that carries the still's weight
When in doubt, pressure-test after any repair. A repaired joint that holds 3 psi for two minutes is a joint you can trust.
Conclusion
Durability in a copper still comes down to three things: pure metal, strong solder, and smart construction. Get those right and the still will outlast most of the gear in your shop.
At Steven StillZ LLC, we build every still by hand from Paul Revere Copper, use 100% lead-free silver bearing solder, and pressure test each unit before it ships.
Order online 24/7 and get a still built to last.
Frequently Asked Questions
What makes a copper still durable?
A durable copper still starts with high-purity copper, typically 99.9% pure, because impurities create weak points that crack under heat cycling. The solder must be lead-free silver bearing to handle thermal stress without failing. Construction matters too: rolled, hemmed, and beaded seams distribute stress better than flat joints. Finally, every unit should pass water and air pressure testing before it ships. A still that combines pure materials, sound construction, and verified leak-free performance will outlast cheaper alternatives by years.
How can you tell if a copper still is made from pure copper?
Ask the manufacturer for mill test reports or material certifications that document copper purity. Pure copper has a distinctive salmon-pink color when freshly cleaned, while alloys like brass appear more yellow or gold. You can also check the weight: 20oz copper feels noticeably heavier than thin-gauge alternatives. If a seller cannot provide documentation or gives vague answers about their copper source, treat that as a red flag. Reputable makers will happily share verification details.
How long should a well-maintained copper still last?
With proper copper still maintenance, a quality unit can last decades. The key factors are initial material purity, solder quality, and how well you care for it. Cleaning after each run prevents acidic residue from eating into the copper. Storing the still dry and covered protects against corrosion. Inspecting seams and joints annually catches small issues before they become leaks. Cheaper stills with thin copper or poor solder often fail within a few years, while well-built ones become heirloom equipment.
What type of solder should be used on a copper still?
Lead-free silver bearing solder is the standard for safe, durable copper stills. Silver content improves the solder's strength and its ability to handle repeated heating and cooling without cracking. Lead-based solder is never acceptable because it can leach into distillate. When evaluating a still, ask specifically about the solder composition. A maker who uses 100% lead-free silver bearing solder and can document it is building equipment that will hold up under years of use.