 how-to
How to Fix Leaking Still Seams: Step-by-Step Guide
Table of Contents
- What You'll Need to Fix Leaking Still Seams
- Step 1: Diagnose the Leak Before You Seal
- Step 2: Inspect the Seam and How to Spot Poor Soldering
- Step 3: Clean, Prepare, and Dry the Repair Area
- Step 4: Repair a Leaking Copper Solder Joint
- Step 5: Copper Still Leak Test and Cure Time
- Common Mistakes to Avoid When Fixing Leaking Still Seams
- When to Call a Professional for Still Seam Repair
- Frequently Asked Questions
Last Updated: October 9, 2026
What You'll Need to Fix Leaking Still Seams
A leaking still seam is a joint failure where vapor or liquid escapes through a gap in the copper body, usually at a soldered connection.
Most leaks trace back to three causes: a weak solder joint, a crack from heat stress, or old sealant that has dried out.
Below, we'll show you exactly how to find the leak, prep the surface, and re-seal it so it holds.
Tools and Materials Checklist
Gather these before you start:
- Lead-free silver solder for copper
- Propane torch with a fine tip
- Stainless steel wire brush
Step 1: Diagnose the Leak Before You Seal
The word "still" covers more than one piece of equipment, and the repair path changes with the material. Before you touch a torch or a tube of sealant, confirm three things: what the still is made of, what is inside it, and whether the seam is actually the source.
First, Identify the Still and Seam Type
- Copper pot still or column, seams are usually soldered or brazed. Repair means re-soldering with lead-free silver solder.
- Stainless steel still, seams are welded or TIG-tacked. You cannot solder stainless with copper solder; you need stainless filler rod or a food-grade mechanical seal.
- Glass lab still or glass condenser joint, seams are ground-glass or gasketed. Repair means replacing the gasket or using a PTFE sleeve, never heat.
If you are not sure which you have, look at the color and weight. Copper is reddish and soft; stainless is gray and magnetic in some grades; glass is obvious. A magnet is a quick stainless check.
Safety Shutdown Before You Inspect
If the still has been run, shut it down and let it cool to room temperature before you inspect or repair any seam. A still that has been running holds hot vapor and, in a closed system, residual pressure. Open the system, depressurize slowly, and never lean over a seam while the still is warm. Alcohol vapor is flammable and heavier than air, so ventilate the area and keep open flame away until you have confirmed there is no residual vapor.
Distinguish a Seam Leak From Something Else
A seam leak is only one of several causes of a drip or a vapor trail. Rule out the others first, or you will seal the wrong spot:
- Fitting or valve leak, liquid appears at a threaded connection, not along the seam line.
- Gasket failure, the leak tracks around a clamp or flange face, not through the metal joint.
- Crack in the body, the leak moves when the still heats or cools, and the metal around it looks stressed or discolored.
Locating the Exact Leak
- Fill the still with water and let it sit for 15-30 minutes.
- Dry the outside of every seam with a clean rag.
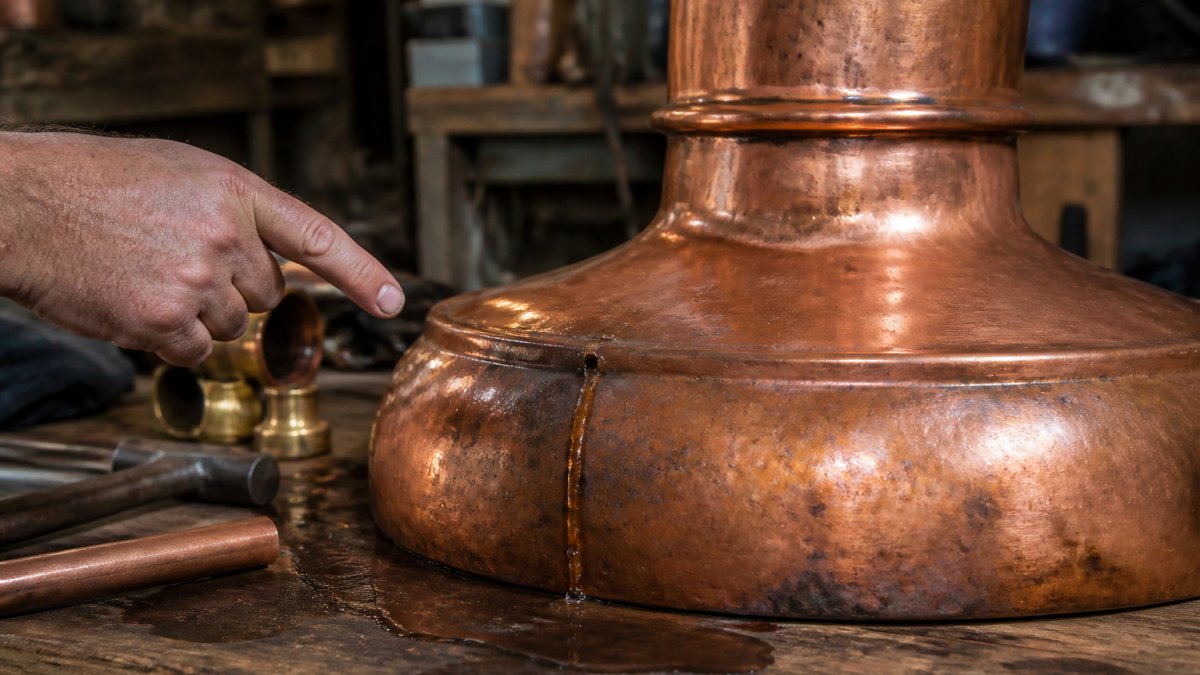
- Watch for a wet trail or a slow drip. Liquid often runs along a seam before it drips, so the drip point is not always the leak point.
- For vapor leaks, run a low-heat test and watch for steam or a hiss.
- Mark the spot with a marker or tape.
A soapy water test is the fastest way to spot a small leak. Mix a few drops of dish soap in a spray bottle of water, spray along the seam, and watch for bubbles. Bubbles mean escaping air or vapor. Check every joint, not just the one you suspect, seam leaks often hide near the base or where a pipe joint meets the body.
Copper Development Association guidance on copper joining
Step 2: Inspect the Seam and How to Spot Poor Soldering
Poor soldering shows up as a dull, grainy, or cracked joint. A good solder joint is smooth, shiny, and even along the whole seam.
Look for these signs of a weak joint:
- Cracks or gaps in the solder
- Solder that looks rough or lumpy
- Dark or oxidized patches
- Solder that pulls away from the copper
If the seam was never fully sealed, you will see a gap where the two copper edges meet.
A common mistake is sealing over a bad joint with silicone. That hides the problem for a while, but the leak comes back.
Step 3: Clean, Prepare, and Dry the Repair Area
Solder will not stick to a dirty or wet surface. Cleaning is the step most people rush, and it is the reason many repairs fail.
Follow this order:
- Scrub the seam with a wire brush to remove old solder and debris.
- Sand the area with emery cloth until the copper shines.
- Wipe away dust and old sealant with isopropyl alcohol.
- Let the surface dry completely before you apply heat.
Surface condition matters more than the sealant you choose. A clean, dry surface gives the solder or sealant something to bond to. A greasy or damp surface will not hold.
Step 4: Repair a Leaking Copper Solder Joint
Repair method follows material. Using the wrong method on the wrong seam is the most common reason a repair fails within a few runs. Match the seam to the method below.
Copper Seams: Re-Solder With Lead-Free Silver Solder
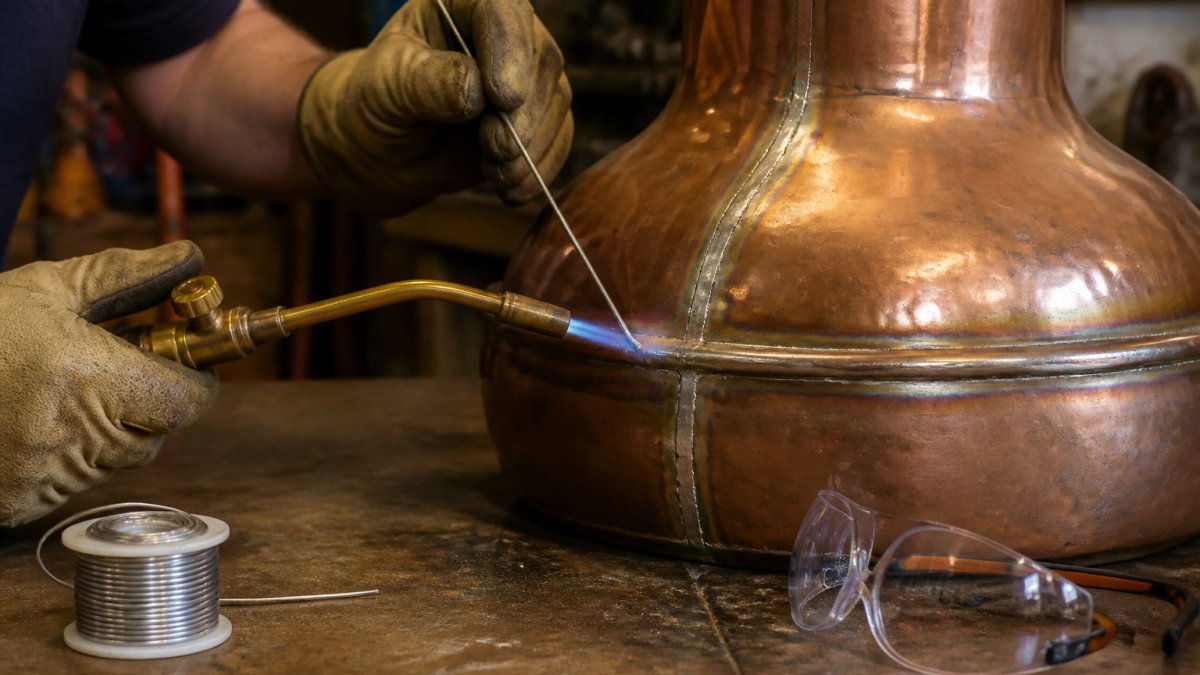
To repair a leaking copper solder joint, reheat the seam and apply fresh lead-free silver solder. The old solder softens, the new solder bonds, and the joint seals.
Work in small sections. Heat one part of the seam, apply solder, then move on. Do not overheat the copper, since too much heat can warp the metal or loosen nearby joints.
For a strong bond:
- Clean the joint right before soldering.
- Heat the copper until the solder melts on contact.
- Feed solder into the seam, not onto the surface.
- Let the joint cool on its own.
Stainless Steel Seams: Weld or Mechanical Seal
Copper solder will not bond to stainless steel. Options are TIG welding with stainless filler rod, or a food-grade mechanical seal such as a PTFE gasket or a stainless clamp. If you do not weld, a mechanical seal is the practical route. Do not try to bridge a stainless seam with silicone alone under heat and pressure.
Glass Seams and Joints: Gasket or Sleeve
Glass still seams are ground-glass joints or gasketed connections. Heat is not an option. Replace the gasket, or use a PTFE sleeve or joint clip. A cracked glass seam cannot be sealed, the section must be replaced.
Gasketed and Clamped Joints: Replace the Gasket
If the leak is at a gasket face, sealing over it will not hold. Remove the old gasket, clean both faces, and install a new food-grade gasket rated for the temperature and the liquid you run. Silicone gaskets are common but degrade with high-proof alcohol and heat; PTFE and EPDM are more durable in most still service.
Sealant Compatibility and Food-Contact Suitability
Not every sealant belongs on a still. Heat, alcohol, and pressure all attack sealants differently, and anything that touches distillate must be food-contact suitable.
- Food-safe silicone, good for cool or low-heat non-soldered seams. Degrades over time with high-proof alcohol and repeated heat cycles.
- PTFE tape or sheet, chemically resistant, food-contact suitable, good for threaded and gasketed joints. Not a gap filler.
- Epoxy, strong bond, but check the label for food-contact rating and temperature limit. Many epoxies are not rated for alcohol contact.
- Lead-based solder, never. Lead can leach into distillate.
Applying Sealant to a Non-Soldered Seam
For a rolled or hemmed edge that is not soldered, use a food-safe sealant rated for your service. Apply a thin bead, press it into the gap, and smooth it with a wet finger. A thick bead traps solvent and cures unevenly. Let it cure fully before any heat or liquid contact.
Step 5: Copper Still Leak Test and Cure Time
A copper still leak test confirms the repair holds before you run a batch.
Cure time depends on your method:
| Repair Method | Cure Time | Test Method |
|---|---|---|
| Silver solder | Cool to room temp | Water fill + soap test |
| Silicone sealant | 24 hours | Water fill + soap test |
| Epoxy resin | Full label cure | Water pressure test |
Fill the still with water and watch the repaired seam. If you see bubbles or a drip, the joint needs another pass.
For a full check, add a little water pressure and watch for any leak recurrence. If the seam stays dry, you are ready to run.
Common Mistakes to Avoid When Fixing Leaking Still Seams
Sealing a wet or dirty seam is the top reason repairs fail. Solder and sealant need a clean, dry surface to bond.
Other mistakes we see often:
- Using lead-based solder, which is unsafe for a still
- Overheating the copper and warping the seam
- Patching a bad joint with sealant instead of re-soldering
- Skipping the leak test and finding the leak mid-run
Each of these turns a quick fix into a repeat repair. Slow down on prep and testing, and the seam will hold.
When to Call a Professional for Still Seam Repair
Call a professional when the copper itself is cracked, warped, or thin. Solder cannot fix damaged metal, and a patch will only fail again.
Signs it is time for help:
- A crack in the copper body, not just the seam
- A seam that keeps leaking after two repairs
- Warped or dented metal around the joint
- Multiple leaks along the same seam
A damaged section may need to be cut out and replaced. That takes the right tools and copper stock.
At Steven StillZ LLC, every still is hand-made with Paul Revere Copper and lead-free silver bearing solder, then water and pressure tested before it ships.
Frequently Asked Questions
How do you find a leak in a still seam?
To find a leak in a still seam, first clean the area and dry it completely. Then apply a soapy water solution along the seam and watch for bubbles while introducing low air pressure. Alternatively, fill the still with water and look for drips. Pay close attention to joints and areas with previous repairs. Mark the leak location with a marker before proceeding.
Can a leaking copper still seam be repaired with solder?
Yes, a leaking copper still seam can be repaired with solder, but you must use lead-free silver solder for copper to ensure safety and compatibility. Clean the area thoroughly, remove old sealant, and dry it completely. Apply flux and heat the seam with a torch, then feed the solder into the joint. Allow it to cool and cure before testing with a copper still leak test.
Is it safe to operate a still with a leaking seam?
No, operating a still with a leaking seam is unsafe. Leaks can release flammable vapors, reduce efficiency, and contaminate your distillate. Even a minor leak can worsen over time. Repair the seam before running the still. If you cannot repair it yourself, seek professional help. Safety should always come first when distilling.
When should a leaking still seam be repaired by a professional?
Call a professional if the leak is in a hard-to-reach area, if the seam is extensively damaged, or if you lack soldering experience. Also, if the still is used commercially or for educational purposes, professional repair ensures compliance and safety. If multiple leaks exist or the copper is thin, replacement may be a better long-term solution than repair.
A still that leaks mid-run wastes a batch and puts your setup at risk. If your repairs keep failing, or you want a still built to hold from day one, Steven StillZ LLC can help. Our stills use 99.9% pure copper, lead-free silver bearing solder, and rolled, hemmed, and beaded parts for real structural integrity. Every unit is water and pressure tested, and backed by a 100% money-back or replacement guarantee. Order online 24/7 and get a still built to stay leak-free.