 Ultimate guide
Is Your Copper Still Structurally Sound?
Last Updated: November 4, 2026
Quick Summary
A copper still is structurally sound when its copper body, soldered joints, and fittings hold under heat and pressure without pinholes, cracks, or thinning walls. Inspect every seam by feel and caliper, run a water and low-pressure air leak test, and retire any still with spreading cracks, bulging, or multiple failed seams.
- Run a fingernail along each seam; any catch, ridge, or gap means the solder did not fully bond.
- A caliper reading at several points around the pot and column reveals thin spots near seams and the base.
- A copper still leak test combines a water fill, a low-pressure air check, and a soapy-water sweep of every joint.
- Retire a still that fails the post-repair leak test twice at the same location.
- Inspect seams and joints before every run and do a full leak test monthly, recording each finding with the date.
Table of Contents
- Why Copper Still Structural Integrity Decides Safety and Flavor
- How to Spot Poor Soldering on Seams, Joints, and Fittings
- Copper Still Wall Thickness: Reading Gauge and Structural Load
- The Copper Still Leak Test: Water, Air Pressure, and Joint Checks
- Common Failure Modes, Warning Signs, and What Each One Means
- Copper Still Repair or Retirement: A Decision Framework
- Inspection Schedule, Cleaning, and Maintenance Records That Hold Up
- Order a Still Built to Pass Every Inspection
- Frequently Asked Questions
Why Copper Still Structural Integrity Decides Safety and Flavor
A copper still is only as good as the seams that hold it together. Structural integrity, meaning the combined strength of the copper body, the soldered joints, and the fittings under heat and pressure, determines whether a run stays safe and whether the spirit inside stays clean.
Here's the uncomfortable truth most buyers learn too late: a still can look beautiful and still be unsound. The Copper Development Association's guidance on copper properties explains why copper's thermal conductivity and malleability make it ideal for distillation, but those same properties mean a poorly joined seam will flex and eventually fail.
Below, we'll show you exactly how to inspect a copper still, separate cosmetic patina from real structural defects, and decide when repair makes sense versus retirement. The inspection framework we cover has one goal: catching a weak seam before it becomes a safety problem.
How to Spot Poor Soldering on Seams, Joints, and Fittings
Poor soldering shows up as pinholes, uneven fillets, and dull, grainy joints where solder failed to flow.
Run a fingernail along each seam. A properly soldered joint feels smooth and continuous. Any catch, ridge, or gap means the solder did not fully bond.
For a detailed breakdown of the visual signs, see our guide on how to spot poor soldering before you run another batch.
Copper Still Wall Thickness: Reading Gauge and Structural Load
Copper still wall thickness determines how much the body can flex under heat cycling without deforming. Thicker copper holds its shape and resists stress cracking; thin copper dents, warps, and fatigues at the seams faster.
You cannot measure gauge with your eyes alone. A caliper reading at several points around the pot and column reveals whether the wall is consistent.
For the deeper guide on choosing the right copper gauge, read our breakdown of copper thickness for stills.
The Copper Still Leak Test: Water, Air Pressure, and Joint Checks
A copper still leak test combines a water fill, a low-pressure air check, and a soapy-water sweep of every joint. Fill the pot with water and watch the exterior seams for weeping.
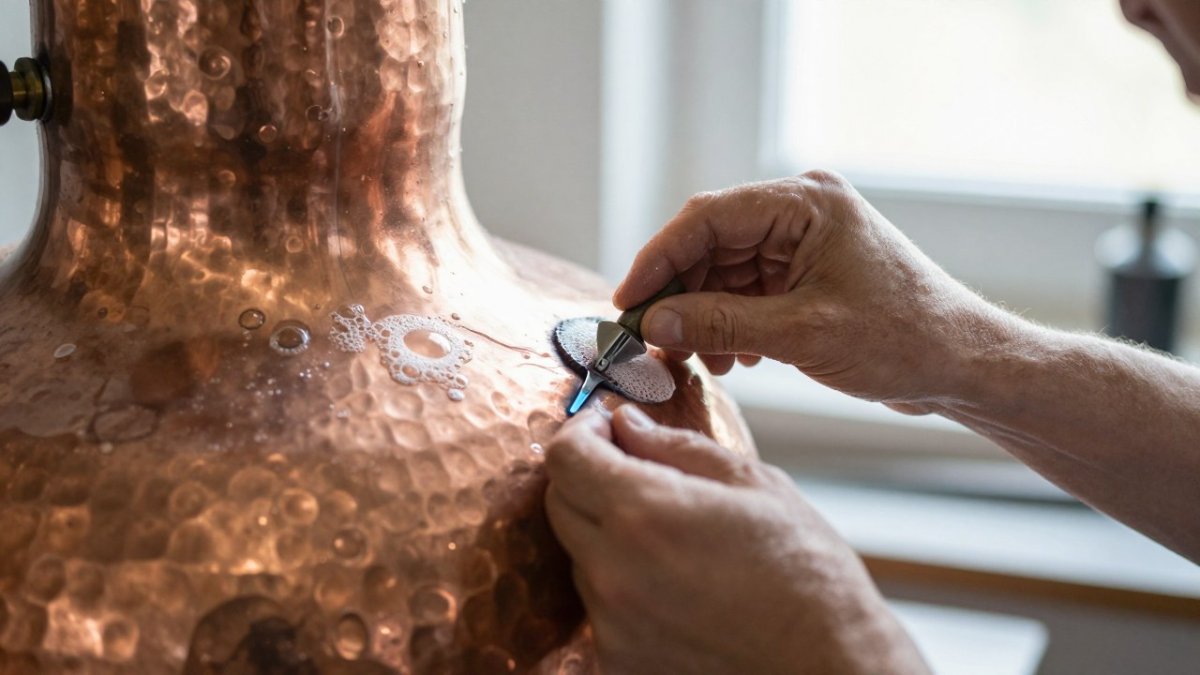
Never pressurize a still beyond its design limits. A low, controlled air charge is enough to reveal a seam that weeps vapor. For the full procedure, follow our step-by-step guide on how to test a still for leaks.
Common Failure Modes, Warning Signs, and What Each One Means
Most still failures fall into a small number of recognizable patterns. The useful skill is not memorizing a list of defects but learning to sort each finding into one of three severity tiers: cosmetic, monitor-and-repair, and stop-use. That sorting is what turns an inspection into a decision.
Tier 1: Cosmetic Findings (Clean and Monitor)
Patina is the thin green-brown or dark-brown layer that forms when copper meets air and moisture. It is surface chemistry, not metal loss, and it does not reduce wall thickness or seam strength.
Watch out: do not confuse patina with verdigris that has crept under a solder fillet. If the green deposit is lifting the solder edge or staining the copper in a line that follows a seam, treat it as a Tier 2 finding until proven otherwise.
Tier 2: Monitor-and-Repair Findings (Fix Before the Next Run)
These are defects that have not yet compromised the vessel but will if ignored. They include:
- Pinholes at fittings. A single pinhole where a fitting meets the pot or column usually means the solder did not fully wick into that joint. It is repairable by re-soldering the joint, but it must be repaired before the next run because a pinhole weeps vapor and can enlarge under heat cycling.
- Solder fatigue. Repeated heating and cooling causes solder to expand and contract at a different rate than copper. The result is a dull, grainy, or finely cracked fillet. A joint that looks chalky instead of bright is fatigued even if it is not yet leaking.
- Localized dents. A dent that does not cross a seam is usually cosmetic. A dent that creases a seam or distorts a fitting seat concentrates stress at that joint and belongs in Tier 2.
Tier 3: Stop-Use Findings (Retire or Rebuild)
These are defects where the safe answer is to take the still out of service:
- Spreading cracks. A crack that has grown between inspections, or that branches, indicates the copper is fatiguing rather than a single joint failing.
- Bulging or broad thinning. A bulge in the pot wall, or caliper readings that show the wall has thinned across a wide area, means the vessel can no longer carry its design load. Thin copper deforms further with each heat cycle.
- Multiple failed seams. Two or more leaking or cracked seams on the same still point to a systemic soldering or material problem, not a localized repair.
The mechanism behind most Tier 2 and Tier 3 findings is the same: copper and solder expand at different rates, so every run flexes the joints slightly. A sound joint absorbs that flex. A joint with a void, a cold solder pass, or a thin wall does not, and the movement concentrates at the weakest point until a pinhole becomes a crack.
If you have found a leaking seam, our guide on how to fix leaking still seams walks through the repair before you decide on retirement.
Copper Still Repair or Retirement: A Decision Framework
The repair-or-retire decision comes down to three questions: Is the defect localized or systemic? Is the surrounding copper sound? Can the still pass a full leak test after repair? Answer those in order, and most cases resolve cleanly.
Step 1: Classify the Defect
Use the severity tiers from the failure-modes section. Cosmetic findings are cleaned and monitored. Tier 2 findings are repaired and retested. Tier 3 findings are retirement candidates unless the still can be rebuilt by a qualified fabricator.
Step 2: Check the Surrounding Copper
A repair is only as good as the metal around it. Before re-soldering a joint, inspect the copper within about an inch of the defect. If the wall is bright, continuous, and full thickness under a caliper, the joint is repairable.
Watch out: re-soldering over a crack without first stopping the crack is a common mistake. The solder bridges the surface, the crack continues underneath, and the joint fails again within a few runs.
Step 3: Repair and Retest
A repaired still must pass a full leak test before it goes back into service. The sequence is: water fill and exterior seam check, a low-pressure air charge with a soapy-water sweep of every joint, and a visual re-inspection of the repaired area after the still has been heated and cooled once. A repair that passes the first test but weeps after one heat cycle has not held.
Step 4: Apply the Two-Failure Rule
If a still fails the post-repair leak test twice, retire it. Two failures at the same location mean the underlying copper or the joint geometry is the problem, not the solder. Continuing to repair a still that has failed twice is how a slow leak becomes a safety incident.
Decision Table
| Defect | Severity | Recommended Action |
|---|---|---|
| Surface patina | Cosmetic | Clean and monitor |
| Single pinhole at a fitting | Minor | Re-solder the joint, then leak test |
| Hairline crack at a seam, sound surrounding copper | Moderate | Stop the crack, repair, then pressure test |
| Solder fatigue at one joint | Moderate | Re-solder the joint, then leak test |
| Crack that has spread between inspections | Severe | Retire the still |
| Bulging or broad wall thinning | Severe | Retire the still |
| Multiple failed seams | Severe | Retire the still |
| Deformed fitting seat | Severe | Retire or rebuild |
When Repair Is the Wrong Answer
Repair is the wrong answer when the defect is a symptom of a systemic problem: a still built with undersized copper, a still that has been overheated repeatedly, or a still with several joints showing the same fatigue pattern.
If you have found a leaking seam, our guide on how to fix leaking still seams walks through the repair before you decide on retirement.
Inspection Schedule, Cleaning, and Maintenance Records That Hold Up
A written inspection schedule turns maintenance from guesswork into a routine. Inspect seams and joints before every run, do a full leak test monthly, and record every finding with the date.
Keep a simple log: date, what you checked, what you found, and what you did. Records matter because they reveal slow changes, like a seam that weeps a little more each month, that a single inspection would miss.
Order a Still Built to Pass Every Inspection
The best inspection is the one you never have to worry about because the still was built right. At Steven StillZ LLC, every still is 100% handmade with machine-cut 20oz copper, joined with 100% lead-free silver bearing solder, and parts are rolled, hemmed, and beaded for structural integrity. Ready to upgrade? Browse the shop to find a still built to pass every inspection.
Frequently Asked Questions
What is the best thickness of copper for a still?
Most professional-grade copper stills use copper in the 20-ounce range, which is roughly 0.7 mm thick. Thinner sheet, often 16 to 18 ounces, dents under its own weight and fatigues faster at seams. Thicker copper holds shape, resists deformation during heat cycles, and gives solder more material to bond to. Ask the builder for the copper gauge in ounces and confirm whether the boiler, column, and lyne arm use the same weight, since some makers thin out the smaller parts.
How can you tell if a copper still is structurally sound?
Start with a visual pass over every seam and joint, looking for gaps, rough solder, or dark pinholes. Tap the copper lightly and listen for a consistent ring; a dull thud can signal a delaminated seam. Then fill the boiler with water and watch the exterior of each joint for weeping. A copper still that passes a water test, holds pressure on an air test, and shows no deformation at the base is structurally sound. Document each check with a date so you can compare results over time.
How do you check a copper still for leaks?
Fill the boiler with water and let it sit for at least 30 minutes, then run a dry cloth along the outside of every seam and fitting. Any damp spot marks a leak. For a more thorough copper still leak test, cap the column outlet, apply low air pressure through a valve, and brush soapy water over the joints. Bubbles show exactly where vapor would escape. Repeat the test after any repair before you run a batch.
When should a damaged copper still be repaired or replaced?
Repair makes sense when the damage is localized: a weeping seam, a loose fitting, or a small pinhole in a thick wall. Replacement is the better call when the copper has thinned across a large area, when the base has deformed, or when cracks keep returning to the same seam after two repairs. A still that fails a pressure test after a proper repair is no longer reliable for vapor containment. Weigh the repair cost against the value of a unit built with verified copper weight and lead-free solder.
How do you spot poor soldering on a copper still?
Good solder flows into a thin, even fillet that hugs both surfaces. Poor soldering shows as lumpy blobs sitting on top of the joint, dark oxidized patches, or visible gaps where the solder pulled away. Look inside the boiler and column too, since a joint can look clean outside and be starved within. A joint that fails a soapy-water bubble test confirms the problem. Lead-free silver bearing solder should be standard; ask the builder to document which alloy they use.
What is the best thing to clean a copper still with?
Use a mild acid solution, such as a diluted vinegar and water mix, to remove tarnish and residue from the interior, then rinse thoroughly with clean water and dry the surface. Avoid harsh abrasives that scratch the copper and create places for residue to collect. For exterior patina, a paste of lemon juice and salt works on light tarnish. Clean after every run, inspect the seams while the still is dry, and record the date so maintenance stays on schedule.
A sound still protects both your safety and the quality of every batch you run. If you're ready to stop inspecting weak seams and start distilling with confidence, Steven StillZ LLC builds equipment with pure copper, lead-free solder, and pressure-tested joints. Get started with Steven StillZ LLC and order a still built to hold up run after run.